Thursday, October 21, 2010

Congratulations to the Winner!

The winner of the $15.00 gift certificate to Scrapbook.com is nmlady.  My thanks to everyone for joining in the Blog Hop.  It was a special day for us and we enjoyed sharing our first anniversary with you.  Now its time to take a break.  Enjoy your day!!

This layout was completed using a beautiful digi kit called A Mothers Love by Kristin Cronin-Barrow and Scrap Kitchen Designs.

Read more...

Monday, October 18, 2010

Ideas for Scrapbookers Anniversary Blog Hop and RAK!

Hello everyone!  It has been such a great experience to be a part of the team of contributing artists for the Ideas for Scrapbookers blog.  Now that the blog has turned one, it's time to celebrate and thank our readers for making this such a good year!  Today I am going to share my favorite posts involving sketches.  As I looked back there were 3 sketches that I particularly liked.  First is a sketch that was created from a readers page.  Anita Marie Bownds submitted a beautiful layout that was used to produce this sketch.  It is great when our creative readers share their talents and give us great ideas too!    Here is the sketch and then a layout that I just created interpreting the sketch.

And here is my layout.

The next sketch is by one of our contributing artists, Heather Landry.  This is a great sketch that could be used many ways.

Heather's example layout for this sketch is adorable.  I just love the pics of her pug!

Last is a sketch by another of our contributing artists, Lisa Blastic.  This is also a very versatile sketch. I loved this idea so much I decided to try a digital layout based on Lisa's sketch.  Here is the sketch.

Here is  my digital layout of my husband and my niece.  I used a great kit called "My Number One" by Eva Kipler to complete the layout.

So now that you've had a brief taste of the great sketches on the Ideas for Scrapbookers blog I have a scavenger hunt  and prize for one lucky reader.  The prize is a $15.00 gift certificate to the Scrapbook.com on-line store.   I have three questions you will need to answer.  To get the answers you'll need to look through the sketches on the Ideas for Scrapbookers blog.  Jot down your answers and email them to me at joy2scrapbook@live.com.  Everyone who sends me the correct answers will be entered into a random drawing.  You have until Wednesday, 10/20/2010, at midnight to email me your answers.  On Thursday, I will send the winner, via email, your gift certificate to scrapbook.com.  I will also post the winners name on my blog. Sounds fun right!  OK, let me give you just a little help to get started.  To view all the sketches easily on the Ideas for Scrapbookers blog, look in the right hand column of the blog and scroll down to the area with the column heading LABELS.  Click on the topic "Sketches" and the posts that involved sketches will be filtered for you.  Now just remember as you hunt, that at least one of the questions below will be found in the "Older Posts" so don't forget to look beyond the first page. 

Scavenger Hunt Questions:
1.  The first sketch you will be looking for is VERY versatile and can be used for an 8 1/2 by 11 page OR a 12 by 12 page.   (Hint:  The sketch is displayed as an 8 1/2 by ll sketch and  the sample layout is a 12 by 12 page).  What is the date the sketch was posted? 

2.  One two page sketch was inspired by a Starbucks ad.  The sketch is based on a readers page.  What is the name of our creative reader?

3.  Which contributing artist for Ideas for Scrapbookers developed a sketch from a layout she did titled "Excellent"?   Send me the Name of the contributing artist that created the sketch.

Since there are just 3 questions, this shouldn't take you long.  Hope you have fun with this.  I'll be looking for those answers in my mail box!  Good Luck to everyone!

Thank you for joining in today's blog hop.  Now its time to move on to your last stop.  Next is Pam Callaghan's blog.  Here is the link: http://mylittlecreativestudio.blogspot.com   Have fun!!

Read more...

Sunday, September 26, 2010

A Wave Template for those Water pictures!

I have been enjoying our puppy, Maggie, however she is growing up too fast! At just over 5 months she is about 50 pounds.  We have found that she loves to play in water, any water, whether it is a sprinkler, puddle, garden hose or her water dish.  We had a kids pool stashed away and pulled it out to see what she would do.  Watching her play was hesterical.  I took photos as best I could (she didn't stay still for very long).  I put a few of them together to create this layout which I titles "Splish Splash."


This layout was done with a digi kit called "Daydream Believer" by Kristin Cronin-Barrow at Sweet Shop Designs.  I just love her work!  If you'd like to try creating a layout with some of your water pictures, I have  a .PSD file of the main wave elements that is available for download  Expired.

For my paper scrapbook friends, here is a .jpg file you can print and use to cut out those waves.  Just cut out the left and right wavy pieces and place them on top of a colorful background paper. 

Hope you will enjoy using this fun template shape with those swimming, beach and fun backyard water games kids like to play.  Thanks for stopping by.

Read more...

Saturday, July 24, 2010

Recapturing memories from the past!

When my husband and I were kids our family's didn't take many pictures.  The thing to do in the 50's and 60's was to take slides.  Of course now digital photography is the mainstay of my picture taking, but what about all those slides sitting carefully packed away in my basement.  A friend of mine bought a slide scanner, because like me, most of her memories from the past are on slides.  She loaned it to me, and told me to figure out how it worked so I could teach her.  That sounded great to me and I could satisfy my desire to scrap some of those precious old memories.  The scanner she loaned me is a "Smart Digital Image Copier" by Stratford Labs.

It came with software which I found very easy to install on my computer.  The slides fit in a long slim back tray which slides through the scanner.  It holds 3 slides, so the process of scanning very many old slides will be a time commitment.  However, the quality of the end picture (.jpg file) is pretty good, actually better than I expected.

Some of the slides I scanned were even damaged.  For example, I was looking for a picture of my husband as a child that I had seen years ago where he was wearing a firefighter helmet. After much searching I found it, but to my dismay the slide had mold one it.  After some research as to what I could do, I found that rubbing alcohol could be used to clean off the mold.  With this task done I could see that the emulsion of the slide did have some impressions in it from the mold, but I still wanted to give scanning a try.  Here is a layout I did with that precious picture.


My husband was between 3 and 4 years old in the top left picture.  While I lost some of the color from the slide, the clarity in the picture was still quite good.  The two other pictures are recent photos.  While my husband is no longer a firefighter, he really enjoyed this job.  He kept his uniform and with a little encouragement I convinced him to put it back on so I could have a "then and now" layout. 

I had some doubts about slide scanning prior to this project, but now I can see that the end product will certainly produce photos that can be used for many things, including scrapbooking. 

Read more...

Sunday, July 18, 2010

Punch an Interesting Circle Border

I have been collecting punches for years and from time to time pull out several of them and just experiment with an idea.  Frequently I use circles in my layouts.  They are pleasing shapes that go well with other layout elements.  I was working on a layout with some pictures of Maggie, our new puppy.  She is such a sweetie I had been trying to achieve a soft pretty look to convey what I felt about her. I wanted to make the edge of one circle a little more interesting and the first thing I though of was to use a punch.  Here is the layout I completed after trying several different punch ideas.  The light green circle has just 1/2 of a flower shape punched around the edge.  I then put small pearls in the flower centers for a delicate touch.


Here is a picture of the punch I used around the edge.


I lightly marked my green circle with pencil marks that I had measured and evenly spaced around the circle.   I used the pencil marks as a guide to evenly place the punched flowers.


I punched the flowers out by turning the punch over and lining up my pencil mark with the center of the flower design.  At the same time I made sure that only half of the flower was going to punch through the edge of the paper circle.  With all the pencil marks it was very quick and easy to make this pretty edge.  The best part is the pencil marks get cut away by the punched shape, so there are no worries about erasing pencil marks from your circle.  Have fun!

Read more...

Wednesday, April 28, 2010

Winner of the Autism Awareness Blog Hop RAK!!

Thank you all for participating in the Ideas for Scrapbookers Autism Awareness blog hop!  It was a great experience for me.  I learned quite a bit about this disorder and that will help me as I work with friends who have children with Autism.

I am so happy to announce that Teresa Jaye is the winner of the $15.00 gift certificate to Scrapbook.com.  If you will email me, Teresa, at Joy2scrapbook@live.com, I will send your gift certificate to you.  Thanks again for participating!  Hope you all benefited from the information we shared.

Read more...

Monday, April 26, 2010

Autism Awareness Blog Hop & RAK PRIZE!!

Thanks for joining the Ideas For Scrapbookers blog hop today.  If you've been hopping along, you just came from Heather's blog where you learned about the Types of Autism.  If you've just joined the hop, you can get a list of all the participating Artists here.  I'm going to be sharing information about the diagnosis of Autism.


Diagnosing ASDs can be difficult since there is no medical test, like a blood test, to diagnose the disorders.  Doctors look at the child’s behavior and development to help make a diagnosis.  They will ask the parents and caregivers to complete thorough histories of the child to help pinpoint when and if certain developmental milestones have been met.  Scrapbooks and baby albums can play a part in helping to record this important information.

ASDs can sometimes be detected at 18 months or younger.  By age 2, a diagnosis by an experienced professional can be considered very reliable. However, many children do not receive a final diagnosis until much older.  This delay means that children with an ASD might not get the help they need.  It is imperative to recognize the early signs of Autism (see Cathy's blog) and request an evaluation for your child as soon as possible.  Experienced doctors that specialize in the diagnosis, treatment and care of persons with ASD can include neuro-developmental pediatricians, neurologists, and specialty care pediatricians.

To learn more, please visit the National Autism Association
 
A few of my friends have Autistic children and I can see the challenges they face with this disorder. To celebrate Autism Awareness month I put together the following layout using the color scheme and puzzle pieces from the Autism logo.   The cute little guy here is my husband at age 3, I treasure these old slides.
 

Because you have taken some of your time today to join our blog hop and make a stop here, I will be giving away a $15.00 gift certificate to Scrapbook.com to one random guest. All you need to do is leave a comment on this post. I will select one person from a random draw and reveal the winner Wednesday, 4/28/10, on my blog, so stop back by to see it its you. Good Luck to everyone!!

Next stop on the blog hop is Sarah who will be sharing information about medical issues that accompany autism.


Read more...

Monday, February 22, 2010

I love border punches!

I have been collecting border punches for a while and added a few to my tools this year when Martha Stewart came out with the "Punch Aroung the Page" sets.  I love to use these when making cards or doing a layout.  The extra detail and texture just adds to any project.  Here is a layout I just finished with photos from a visit we made to Virginia.  My sister-in-law has a beautiful farm in the Shenandoah Valley and I couldn't get enough of the country views.

I have been layering my punches recently and really like the effect.  In the layout above I put a bold blue under my border punch and made three layers of scallop punched strips in the center of this layout to make a nice break in the page.  It make take a little more work, but I do like to use regular border punches to make a frame.  The layout below I created from a Liz Qualman sketch.  I love her work!  This layout uses a wide Martha Stewart border "Trellis" punch and it made a frame that really stood out on the page. 
I had fun with this project because the punch had a wide enough spacing in the design to weave a ribbon through.  This added to the texture and color scheme of the layout. 

Read more...

Sunday, February 7, 2010

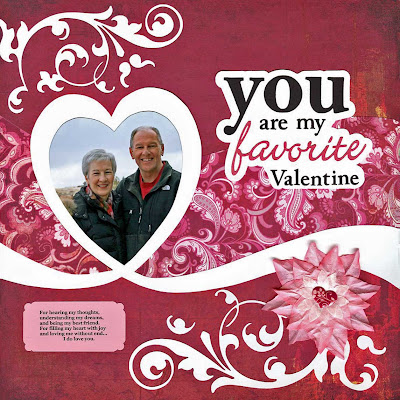
A Heart Swirl template for your Valentine photos!

I was considering what my next post might be to the "Ideas for Scrapbookers" blog and thought about Valentine's Day.  Since the holiday was so soon and I have a tender heart for this holiday I decided on creating a template with a heart.  I have special memories of Valentine's Day for a number of reasons.  I met my husband in February, and our second date was on Valentine's Day.  It wasn't one of those dates where everything turns out perfect, but it certainly showed me how considerate and easy going he could be.  The date didn't fall apart just because things didn't go as he had planned (we didn't get to eat at the fancy restaurant on the coast with the great view).  I had a great evening because he knew how to make the best of it, and make me feel special no matter where we ate dinner.  That's still true today! 

I am posting two examples of the template, one that is simplified and one that is a bit more complicated.  Here is the simple version.


This layout used just two pieces of the template, they run through the center of the page.  The template can be downloaded at http://ideasforscrapbookers.blogspot.com/

I used paper from the Basic Grey Bittersweet collections to prepare these layouts.  I loved the bright colors in this one.  Since I wanted to keep the first layout simple, I decided to adorn it with fancy flourishes.  This flourish is a Quickutz digital image that is available for purchase from their online store.  I cut the shape using my Klick-N-Kut ditigal craft cutter.  It would, of course, cut fine on a Silhouette too!  I decided to add a flower but didn't find anything in my supplies that was just the right color.  I have read a few posting lately about using coffee filters to make flowers.  I also watched a video of a segmet aired on Martha Stewart where a lady has been making lovely roses with coffee filters.  It got me curious enough to try one myself.  Well this is my first attempt at a coffee filter flower, it's kind of my own twist on the process which I have not yet perfected.  However it was fun to experiment and has great potential since the coffee filter paper is easy to paint, has good texture and will hold a shape once it has dried.  It actually looks a bit better in person.  I scan my layouts, so of course I squashed the flower to scan the layout.

My second layout uses all the pieces of the template.  I wanted to combine a full color photo with black and white photos to create more emphasis on the heart.


For this layout the shapes and picutres were the focus, so I kept the embellishments to a minimum.  I did try a new technique that I read in a nice tutorial at the Swirlydoos website.  The flourish embellishment in the upped left corner I made using 3D paint and clear craft plastic.  It was very easy and actually a lot of fun to do.  The tutorial I watched was located at: http://www.swirlydoos.com/page.php?46.  I found clear craft plastic at Michael's and it was not expensive at all.  They also sell the 3D paint.  The colors I used here are Watermellon and Candy Pink.  I then did my journaling in swirls to repeat the look of swirls on the page.  Most of my patterned paper shapes here have the edges distressed with Walnut ink to improve the contrast on the page.

Thanks for visiting.  Hope you have a lovely Valentine's Day!

Read more...

Thursday, February 4, 2010

I'm a contributing artist....it's exciting!

I am very excited to be joining the team of creative people at "Ideas for Scrapbookers" as a contributing artist. The group of ladies here are very talented and the website is packed with interesting scrapbook ideas. You can visit us here: http://ideasforscrapbookers.blogspot.com/

There are templates, tutorials, tips and tricks to make your pages stunning. There is a contest just starting for those of you who enjoy a good challenge. You'll need to lift one of the contributing artists and there are GREAT PRIZES. So come over and join the fun!

Read more...

Adding downloaded fonts to your computer

I have collected quite a few fonts because I love creating interesting titles on my layouts. From time to time I get asked how to add a downloaded font to a computer. It's not difficult so I am going to share here the steps. I have two computers, one is Windows XP and the other is Windows Vista. Since the steps are slightly different I am going to list both ways.

Windows Vista

1) I like to run a virus scan against any file I download from the internet, so I encourage you to do this if you have virus protection software on your computer.
2) Downloaded font files are generally .zip files and so the actual font files need to be extracted from the .zip file. On your computer, go to Start, then choose Computer. A window with all your computers drives and folders will open.
3) Navigate to the location of the .zip file that has your font. Right click on the file, you should see a small menu, choose "Extract All". The window will give you an option to save the contents in another location. If you don't choose another location the contents will be extracted to the same location that you saved the .zip file. Remember where this is because you will need to find this location to install the font.
4) Close or minimize the window that you have been working in. Then go to Start, then choose "Control Panel." When the window opens, click on the "Font" icon. You should see a list of all your fonts. Just right click in this area (somewhere in the white space, don't choose a font). A drop down menu should appear. Choose "Install New font" from the menu. A window will open. Here you will have to navigate to the folder where you saved the contents of your .zip file. When you are in the right location your font that is available to install will appear in the list portion of the window. When you see it, just highlight the font name and click the install button. That's it.

Windows XP

1) In Windows XP I like to work in the "Windows Explorer" window. To get there go to START, the choose PROGRAMS, then choose ACCESSORIES, and finally choose "Windows Explorer". This window will display all of your drives, folders and files. Navigate to the folder that is holding the .zip file you downloaded. Right click on the .zip file and a drop down menu appears. Choose "Extract All" from the menu. A wizard is going to open. In the first window click the NEXT button. Now the wizard will ask you where you want to put the extracted files. You can use the "browse" button to navigate to a different location if you wish. If you don't choose a different location the files will be extracted to the same location where your .zip file sits. Click the NEXT button and Windows will extract the files. Click FINISH and the wizard will close. Remember the location where the font files now sit. Now close or minimize Windows Explorer.
2) To install the font, go to START, then choose CONTROL PANEL. When the window opens double click the FONTS icon. A window will open and display all the fonts on your computer. Go to the menu bar along the top of the window. Choose FILE, then choose INSTALL NEW FONT. The "Add Fonts" window will open. In the lower half of the window you will need to navigate to the location where your font file sits. When you are in the right location the font name will appear in the upper half of the window in the "FONT LIST". There will be a check box at the bottom of the window that says "Copy fonts to Fonts Folder." Make sure the check box is CHECKED. Highlight the name of the font and click OK. The font should install and you should see an icon for it in the Fonts window.

Read more...

Thursday, January 21, 2010

"Ideas for Scrapbooker" Guest Contributor

I am so pleased that I was invited to be a guest contributor on the "Ideas for Scrapbookers" blog. It has been so fun coming up with some layouts to share. Pammy has done a wonderful job of creating templates that make pulling together a layout a snap. She has also brought together a group of scrapbookers with a wide variety of skills so the ideas are really flowing at this blog. I chose to use one of the templates Pammy created put together the layout below. This is the Ellipse template and it can be downloaded at http://ideasforscrapbookers.blogspot.com/


Working with the template was interesting and I decided to try my hand at creating a couple of templates I could share. My first thought was to do something easy to use and that had a little versatility. So I chose an octagon shape and divided it up into sections. My final layout using this new template is here, titled "Athens Greece". There are more details on how I used the template on the "Ideas for Scrapbookers" blog.


I did one other layout just for fun. This time I wanted to do something with winter, and snow. So I created a snowflake template and put together the layout here using some very pretty BoBunny papers from their Snowy Serenade collection. The template is 3 pieces, but really easy to use.


Hope you enjoyed these pages. All of the templates are available on the "Ideas for Scrapbookers" blog at the link above. Thanks for visiting!

Read more...

It's been a while...

Life is so full, I have not taken the time to post in recent months. But now I'm focused again on scrapbooking and looking forward to sharing. It's hard to believe the holidays went by so quickly, yet here it is the later half of January! I got a great Christmas present from my dear husband. Since I am such a techie, I have really enjoyed my Silhouette digital craft cutter. However, it was limiting in that it could not cut a 12 x 12 piece of paper, and it struggled with THICK card stock. Well my DH got me a Klick-N-Kut Groove-e which is turning out to be wonderful. It has cut everything I have thrown at it with ease, and since it is 13" wide it can cut the 12 x 12 paper with no effort. Here is an example of the background is can cut. The brown layer with the fern design was cut with the KNK Groove-e.


I still have a lot to learn about the software that came with the machine, however from my initial review of the users manual, this software is going to really make creating some of my own designs much easier. It also has the capability of converting other digital cutting formats, so I can still use all the shapes that I previously accumulated while using the Silhouette. It's going to be fun!

Read more...

About This Blog

  © Blogger templates Newspaper III by Ourblogtemplates.com 2008

Back to TOP